Search Results
123 results found with an empty search
- A FREE QUILT AS YOU GO ALONG YOU WILL ACTUALLY WANT TO DO
PART 1 AND REQUIREMENTS LIST. This week I made a spur-of-the-moment decision to start a FREE, WORLDWIDE QUILT AS YOU GO-ALONG on our YouTube channel, Pattern Poole TV. So tell your friends, tell your guild, and tell your local shop, everyone is invited to join in the fun! This is because every week, I make a different sample for our YouTube video, so instead of them hanging around the studio without a purpose I decided to start a FREE QUILT AS YOU GO-ALONG but here’s the thing, it’s a mystery quilt because I’m making it up as I go along, there will be no printed instructions as all instructions will be given in the YouTube videos, it’s a scrap quilt and I’ll just be using up fabrics from my stash so I’ll give an estimated requirements list for the quilt top and I’ll let you know what you’ll need for everything else. Each block will start with a 10” backing square and when joined together they will finish at approximately 9”. I’m going to join my quilt together with the cover strip on the back in the same way that I did for the Diamond String Quilt but there will also be the option to join with the joining strip method. This is a picture of the Diamond String Quilt: We'll be making a lap size quilt, made up of 36 blocks and will be laid out with 6 across and 6 down, just in the same way as my red and white Cherry Cheer quilt pictured below. I’m also going to finish it in the same way with the picket edge. The finished size of the quilt will be approximately 54” (137 cm) square and with the picket edge it will be 60” (154 cm). Requirements: As mentioned, I’m going to be using fabrics from my stash, including the backing squares so the fabrics will be different on the back and in no particular order. If you don’t have a stash of fabrics, I recommend purchasing fabrics for the quilt top as suggested below, this is an estimation, and you may have leftovers or you may need to purchase more. Make sure that you get a good range of light and dark fabrics to make your blocks pop! You’ll also need to purchase what’s on the additional requirements list. Estimated fabric requirements for the quilt top: Option 1 30 x fat eighths. Option 2 1 layer cake (40 x pre-cut 10” squares) this will give you a large range of fabrics but at times a 10” square may not be big enough to cut some strips. Plus 6 fat eighths. Option 3 22 fat quarters, this will be plenty of fabric and some fabrics will be repeated in the quilt. Additional requirements: Backing fabric: 2.5 m (2 ¾ y) This is if you choose to do 1 fabric on the back. Cover strips for the back: 1.25 m (1 ½ y) Add to the above amount if you would like in the same fabric as the backing fabric. Picket edge: 1.35 m (1 ½ y) Batting: 1.5 m (1 2/3 y) Note: Batting is normally 240 cm (94”) to 250 cm (100”) wide. Use your favourite type or recommended is a low loft cotton, bamboo, cotton bamboo blend or 80% cotton and 20% poly blend. Also recommended is a batting with a scrim because it’s more stable and is easier to mark lines on as some of the blocks will require. So what's a scrim? A scrim is a very fine mesh stabiliser that is needle punched onto the batting fibres, it's very fine and can be difficult to see. The scrim prevents the batting from stretching and it also means that your quilting lines can be up to 10 cm (4") apart. I prefer a batting with a scrim for making QAYG quilts because when I cut it into pieces is stays in shape. The photo below shows a batting with a scrim, as mentioned, sometimes it’s difficult to see but as this scrim doesn’t go all the way to the edge of the batting, I was able to peel some of the scrim away to show it in the photo. I’ll be keeping the equipment to make the quilt basic; this is what you will need: Rotary cutter, ruler and cutting mat. Fabric marker, I use the Sewline Trio Ceramic Marker. Quilt basting spray is optional. (Fabric tends to naturally grip onto bamboo and cotton batting) General sewing supplies like pins, tape measure, paper scissors and fabric scissors. Neutral colour thread that blends with your fabrics. Sewing machine with accessories: Standard foot ¼” foot Walking foot if your quilt square puckers when sewing with the batting. Size 70/10 universal needle for piecing Size 80/12 quilting needle The 4 blocks from the video below, will be the first 4 blocks, so watch this video first. There will be another 32 blocks, some will be repeated, and some will be 1 off designs. Take your time, enjoy the process, don’t take it too seriously and have fun! If you don’t like a block, put a binding on it and make it a post holder (woops, I meant pot holder) or a mug rug! Join our private Facebook group Pattern Poole Sewing if you would like to ask questions, share a picture of your block or see what others are making. And if sharing your photos on Instagram use the hashtag: #PatternPooleQAYGalong2021 Lots of love! Monica and Alaura xxoo
- JOINING 36 BLOCKS TOGETHER QUILT AS YOU GO!
FREE QAYG ALONG PART 15 This week we had a lot of fun joining our quilt and recording the footage for our YouTube video. Click on the link below to watch the video. We love making the videos together and teaching others to quilt and sew and we plan on making many more! I love the back just as much as I love the front! We'll be finishing our quilt with a fancy picket edge and we'll show how to do this in the next video. Haven't heard about our FREE QUILT AS YOU GO ALONG? You can read all about it here. The picket edge is the same edging as the Cherry Cheer quilt that is pictured below. To join the blocks together we used our Easy Cover Strip method. The cover strip is a 2" strip that is prepared with a 1" bias tape maker. (Your strips don't have to be cut on the bias). Instead of cutting and preparing my cover strips with a 1" bias tape maker, I used pre-made 1" cotton bias. You can use pre-made bias but I recommend that it's 100% cotton and the edges meet on the back of the strip, beware of thin polycotton bias binding, it's too thin and see through. If you want to use pre-made bias, you will need 16 m (17 yards) to join the blocks and an additional 6.5 m (7 1/2 yards) to join on the picket edge, otherwise you can finish your quilt with a regular binding, for this you will need 65 cm (3/4 yard). The blocks started as 10” squares with a ½” gap of batting all around the edge. The ½” gap allows for a bit of shrinkage, a bit of shifting and a bit of trimming. My blocks shrunk about 1/8” during the making process. So, when you trim, try to trim an even amount away from each edge. This will leave you with a gap of batting that is about 3/8” away from the edge, it’s ok if this is not exact and some of the batting gets caught in the seam, it just works out well not having the batting all the way though the seam allowance as it reduces the bulk in the seam, which means that the seam will sit nice and flat. If you don’t have a square ruler that is big enough to trim the blocks you can make a 9 ¾” square template with template plastic which is usually available from your local quilting store, or you can also use any clear or opaque plastic that you are able to cut with your scissors such as clear vinyl that is used for tablecloths. To make a template, use a fine tip permanent marker to draw up the square. Cut the square out with scissors. (Not your good fabric scissors lol). Mark diagonal lines from the corners and then mark the centre vertical and horizontal lines. I also marked a border that was 1 1/8” around the edge and then another that was 1 3/8” around the edge. Make sure that the marks are dry and wipe over with some paper towel before you use the template on your fabric. The centre lines and border lines will help you to square up the blocks, make sure that they are as centred as possible. You’ll see in the photos below that you can use the marked border lines to align them with the border seams on the blocks. Mark around the edge of the template with a fabric marker, remove the template and use your patchwork ruler and rotary cutter to trim the blocks. It’s not advisable to use a rotary cutter against a thin template, as you could slip and cut your fingers. Once your blocks are trimmed, watch the video below to see how to join them together with my Easy Cover Strip Method. This method is fully machine-sewn and can be used on the front or back of the quilt, with this quilt I put the cover strips on the back, so that there is no interruption between the blocks, giving the quilt a traditional look. I’ve made many quilts with this method in all different sizes and configurations, for some inspiration you can check them all out on our website here we have lots of PDF patterns and even some e-books. If you don’t already know, when you buy 4 PDF patterns on our website, you get one FREE! Just add 4 PDF patterns to your cart and use the code FREEPATTERN at the checkout to get your FREE PDF pattern. Wishing you a happy and creative weekend! Monica and Alaura xxoo
- MAKE THIS BOW BAG
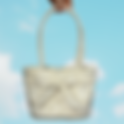
A bag project that isn't made like a typical handbag! Remember making handbags for people out of patchwork fabric, and you would step back to admire your work to find the bag just to fall flat? Well, Mum sure does, and when she started creating her handbag designs back in the 2000s, there weren't a lot of interfacing products on the market. So one afternoon in 2005, she had the idea to make a cute bow bucket-style bag and quickly headed to her dress-making stash to see what she could use to hold the bag up. And there she found it... a product used for many years in dressmaking... Cue The Rigilene Boning Rigilene Boning - 100% polyester sew-in, lightweight boning is is made for projects that need extra support and shape like eveningwear, theatrical costumes, strapless Bridal gowns, etc . At the time, mum was making a lot of wedding and formal gowns , so she was in excessive supply. When we were filming the tutorial, I asked her, "How did you even think to use the boning to give your bag the shape?" Mum told me at the time, she was making many bridal and formal dresses and always seemed to find something in her stash to use in her handbag designs. "I didn't really think too much about it ; I saw it and was like yep that will do, I sewed it into a side seam, and it turned out amazing. Then I just kept going, I sewed more into the next seam and then around the top, and it just worked perfectly." Back in the 2000s, Mum was doing many craft shows around Australia and the Bow Bag was one of her best-selling bag patterns. We decided it was time it made a comeback to our YouTube channel and created a fun tutorial showing you how to make it. (link below) The PDF pattern includes two sizes so you can make a larger or small one depending on the nature of your use. Another great thing about this design is that there is no zipper! Click the image to view the tutorial. If you would like to make this bag, the PDF pattern is available for purchase below. The Pattern includes both sizes as well as step-by-step photo colour instructions to make the sewing experience as fun and easy as possible! Purchase pattern here. We hope you have fun making this gorgeous little design, I had many of these bags made for me when I was a little girl, and now I plan on taking our new cream one out and about. Our latest design is made using a cotton brocade fabric that we sourced from a deadstock fabric store. You can really have a lot of fun thrifting fabrics or buying deadstock these days. We also purchased an array of satin deadstock fabrics to make more bags in, so please watch this space! If you make this bag, please comment on how you went below, or leave your thoughts on what we should make next. lots of love xx Alaura
- Quilt as you go, Master Class,
Island Home, a quilt as you go quilt made with six methods of quilt as you go. The perfect master class for those looking to dive into Pattern Poole quilt as you go. Watch the video for more information. You can purchase the course notes as one ebook or as separate blocks. Fabric Panel: Limited Stock Watch The Island Home Series: Episode 1: Episode 2: Part 1 Part 2 Episode 3: Episode 4: Episode 5: Episode 6: Episode 7: Episode 8: Episode 9: Episode 10: Episode 11: Episode 12: Episode 13: We hope you enjoy this series!
- Tips For Getting Started With quilting!
Perhaps you are a beginner quilter looking to get started in quilting, or you have made a few quilts and still feel a bit lost. Well, we asked our Facebook group of over 11k member's to dish on the best tips and advice for beginner quilters. These tips are so good we had to turn them into a blog post, so check them out below and if you have any more to add, let us know in the comments. We love all of these tips, and it is evident that there is a clear running theme from all of these quilters: start simple, be kind to yourself, and enjoy the process. Do you have a favourite tip or anything you would like to add? Let us know in the comments, and don't forget to share this post with your friends! We would like to thank everyone who participated in our first write-in! We appreciate your openness and great advice. If you would like to be a part of our next write-in, sign up and watch for our next newsletter and also let us know what topic we should discuss. Check out some of our new PDF quilt as you go patterns:
- On Becoming Obsessed with Quilting + Sneak Peek of Our Latest Crumb Quilt!
Ah scraps, the inevitable by-product of quilting! Some discard, some keep, and others hoard and collect, turning them into beautiful quilts. I have a confession, I have always wished to be a scrap textile artist. I would envisage myself making these grand appliques with all my saved pieces but for some reason, I could never make a start. Usually, I make my appliques from my stash and scraps, however, the smaller the pieces became, the more difficultly increased. Then something happened after weeks of filming our free quilt as you go along. Long days behind the camera and then countless hours of editing made me obsessed with quilting. I would go to bed at night practicing in my mind's eye the process of stitching and flipping and sewing from dot to dot - (if you know you know). Suddenly my Pinterest feed evolved from fashion to quilting images. Just like that, I had caught the quilting bug. I have always steered clear of quilting in the past as sewing precisely just wasn't something for me and I preferred to stay in my lane with applique. I could easily palm off some messy sewing as a 'sketchy look' that kept the perfectionist voice inside me at bay. When we made our string quilt, I started researching the history of quilting. I was swept up in the community and thriftiness of it all. My generation missed out on the essential skill of sewing. There was no need, with the rise of fast fashion you could buy a top cheaper than you could make it. Not only that, all the manchester you could dream of existed at department stores for low prices. I was one of the only people at my school who could sew and who also had a mum who could sew. Yet, now as a society, we are shifting again. My generation is moving away from fast fashion due to the increasing awareness of textile waste. I feel that this could bring things full circle. Historically, string quilts and crumb quilts were made from all different types of fabrics cut up from old clothes, blankets, flour sacks, etc. Please note that I am not glorifying this as in the articles I read, this was a sign of the economic times. More so, I am inspired by the geometric patterns and works of art created. As a society, we are always facing changes and challenges in the world. I believe that there is a lot to learn from the past that can help us with today and the future. The thrifty secrets of my generation were common knowledge of those times. My late Grandmother Jeanie was a supreme dressmaker, she never wasted anything. Her frugality, a habit learned from the economic times she faced in her life, ended up challenging her creativity to produce works that never would have existed if she could easily pop to the fabric store. A few months ago, in her memory, Mum made a coat to wear to her funeral using fabric in Grandma's stash. Mum chose a striking green knit, however, halfway through the project, Mum realised she didn't have enough fabric. We were determined to make the entire project only using this fabric. Grandma had started cutting the fabric into strips so these parts that we originally thought were unusable, ended up becoming the feature on the lower skirt. At business school, we touched on this concept in entrepreneurial studies. My teacher called it bricolage, from the French word meaning DIY. In the business world, it is the process of constructing a start-up with an array of whatever is available and on hand. My professor said this type of entrepreneur tends to have the most success as they push themselves creatively. I remember chuckling to myself and thinking about how this concept that has been deconstructed, studied and analysed is something a lot of quilters do naturally. So after much deliberation, I decided to steamroll Mum's plan for the week and we started crumb quilting, if you follow along with our social media you may have seen the updates. It was the first time I quilted in 2 years!!! I never have time to sew as we are a two women show and I also have another business outside of Pattern Poole. The process of stitching together tiny pieces was actually therapeutic, especially with Mum's tips and tricks. We get a lot of comments from people who say she makes things look easy. I can attest to this, after much struggle with my temperamental machine I was almost too exhausted to continue, but I pushed through and we completed all our scrap/crumb sections for the quilt. We filmed a lot of it on my new camera for vlogging and next week when we release the tutorial it will show both of our perspectives to include some beginner troubleshooting. (But I haven't checked my footage yet so It could all be rubbish) Next, we moved on to making the blocks, I finally got to stitch and flip my first ever block and it was so addictive. All that practice from obsessive thinking about it and mentally practicing had paid off. Mum has come up with the most creative design for this quilt using a mix of scraps, crumbs, and strings for the entire array of diverse pieces that exist in one's stash. I am excited to edit this video. You may have noticed we don't really give any time frames and info much these days. We have found we work better when we don't have deadline as sometimes life gets in the way or our designs take longer than expected. However, we are aiming to release our new full-length tutorial next week on Wednesday morning (Eastern Standard Time). We are also writing up a pattern that you can purchase as a PDF from our website if you wish to make this project. So, moving forward we have finished all our blocks and on Monday we are going to join them together quilt as you go and I can't wait! In the meantime, I am going to get sketching on these fun quilt ideas that I want to make and we hope you join us on our new journey of working towards being more sustainable with our quilting. We are not perfect and of course, will still buy fabric mindfully, I even want to design my own fabric for personal projects, however, we want to make tutorials that are accessible to everyone. Where possible we make our own templates because we don't want to exclude anyone from diving into the fun and fulfilling world of quilting. Quilting is clever, therapeutic, community building and life-changing. Every day we can feel the embrace from the community we have all created together during this strange time that we are living through. Thank you for being a part of it! xx Alaura Wishing you a creative weekend! Alaura xo
- The Quilt as you go Chronicles
Meet our I, Valentine Quilt. A medallion-style quilt as you go quilt - that doesn't look quilt as you go! The Quilt as you go Chronicles is a YouTube series documenting how we made this quilt. Watch the video below to find out more. Watch the series below. The Quilt as you go Chronicles The Quilt as you go Chronicles Season 1 The Quilt as you go Chronicles, Ep 1. The Quilt as you go Chronicles, Ep 2. The Quilt as you go Chronicles, Ep 3. The Quilt as you go Chronicles, Ep 4. The Quilt as you go Chronicles, Ep 5. The Quilt as you go Chronicles, Ep 6. The Quilt as you go Chronicles, Ep 7. The Quilt as you go Chronicles, Ep 8. The Quilt as you go Chronicles, Ep 9. The Quilt as you go Chronicles, Ep 10.
- FUN PROJECT IDEAS FOR THE NATURE'S CREATURES COLLECTION
One applique collection with endless possibilities! What will you make? The Nature's Creatures applique collection is a range of 16 little critters, but the best part is each design can be rotated to make its own pattern repeat and unique quilt-as-you-go quilt. Say, you like the Butterfly; you can use this pattern to create a stunning quilt as you go quilt like this: You get the idea... There is so much that you can do with this versatile applique series, it’s up to you, and we’d love to see what you create! So here are the details: Background fabric: Each design starts with an 18” (45 cm) square. Actual applique design size: 13” (33 cm) square. IDEA 1: FRAMED TEXTILE ARTWORK This is just a fun and achievable way to start making appliques because there is no pressure to put them into a quilt. You can hand sew or embroider details and then hang it proudly for all to see! After all, quilting and applique is a beautiful and skillful art form and deserves a stunning frame. Not only that, your framed textile arts make thoughtful gifts, and you can also upcycle frames from your local thrift store. (Definitely a fun school holiday project for kids). To frame: The Ladybug design will fit a 14” (36 cm) square frame. This 4-minute video shows a no-sew applique method and an easy way to frame an applique design in a photo frame. IDEA 2: CUSHION! With Gucci designing stunning cushions for thousands of dollars, why not create your own ornamental cushions to wow yourself with your outstanding work when you return to bed at night? This design will make a 17” (43 cm) finished cushion. This 7-minute video shows how to quilt an applique block and how to make a no zipper cushion: DIY Quick & Easy No Zipper Cushion With Koala Applique Design! - YouTube This 8-minute video shows a really easy way to insert a zipper in the back of an applique cushion. How to Make a Quick & Easy Zipper Cushion With Raw Edge Applique & Free Motion Sewing Option! - YouTube IDEA 3: A QUILT-AS-YOU-GO QUILT OR WALL HANGING For this idea, there are many options. We have lots of quilt-as-you-go methods on our YouTube channel. Find your favourite method and make as many Lady Beetle blocks are you like. I have designed this applique so all the floral details line up and can make a complete flower if repeated. You could also make a wall hanging with four Lady Bugs. Image for inspiration, the pattern does not include these instructions. One Quilt block: After the applique is complete: Trim to 16 ½” square for a regular ¼” quilting seam allowance. The finished size of the block after seam allowance is 16” square. Wall hanging with design repeated four times: Cut a 32” square of background fabric. Fold vertically and horizontally in half, lightly press to make centre creases. Position the applique design in each quarter of the background square. You can position it with a gap in between or edge to edge. Shapes that touch, for example, the orange flower centre, you can trace as a full piece; in this case, trace as a full circle. IDEA 4: Make a complete quilt with the Nature’s Creatures Collection. Quilt size: 64” square. Requirements to make a quilt ( Requirements based on 42” wide 100% cotton quilting fabric) Applique fabric: Use your stash, or we estimate an assortment of 12 fat quarters. Background fabric: 4 ½” yards (4 m) Recommended is a solid or non-directional print. Backing: Same as above. Batting: 2 ¼ yards (2.10 m) Based on 94” (2.4 m) wide cotton batting. Binding: ¾ yard (75 cm) Make your quilt in a regular way or make it with your favourite quilt-as-you-go method. We have a whole playlist of quilt-as-you-go techniques on our YouTube channel, Pattern Poole TV, to get you inspired! We can't wait to see what you make!
- THE MUST-HAVE FANCY EDGE FOR YOUR QUILTS!
FREE QAYG ALONG PART 16 Finishing your quilt with a fancy edge looks really pretty and adds that extra special touch! In our Fancy edge video, you'll see how I added a picket edge to our quilt as you go along quilt. Click here to watch the video. Oh, and if you're wondering, I call it a picket edge because the points look like the top of a picket fence. In the tutorial, I show you how to measure your quilt, how to calculate how much fabric you will need, how to make the picket template, how to make the picket edge and how to attach it to your quilt. This fancy edge technique is suitable for QAYG quilts that are made with our Easy Cover Strip method, this is because the batting finishes 1 cm (3/8”) away from the edge of the quilt and this reduces the bulk in the seam. You could add a fancy edge onto any quilt using this method, provided that the quilting hasn’t been stitched all the way to the edge of the quilt and you are able to trim away 1 cm (3/8”) from the batting around the perimeter of the quilt. This is just one way of attaching a fancy edge to a quilt, we have lots of quilts with fancy edges, you’ll see some of them in the video. All of the quilts have patterns with full size templates and step by step instructions to guide you through the process. We’re proud to say that our patterns have a great reputation! You can see the patterns on our website here. We’re currently in the process of converting our patterns to PDF, if there is one that is not PDF that you would like, please let us know. What you will need This is what you will need to add a fancy edge to a quilt that is the same size as our quilt which is 137 cm (54 ¼”) square. If your quilt is a different size, you’ll see how to work out your requirements list in the video. Requirements are based on regular 110 cm (44”) wide fabric. Fancy edge fabric: 1.35 m (1 ½ y). Half this amount and purchase 2 fabrics if you would like the front and back to be different like we did with our quilt. Binding: 35 cm (14”). Or 6.5 m (7 ½ yards) of premade 100% cotton bias that is 25mm (1”) wide. (When opened out it measures 2" wide) Batting: 40 cm x 140 cm (16” x 55”) Template plastic or cardboard to make the template. Usual quilting and sewing supplies. Here are some steps to follow along with the video. Measure your quilt Do not stretch the quilt let it lay where it wants to. Measure through the centre in both directions and measure each side. When measuring the sides, lay the tape 2” to 4” in from the edge. Sometimes the outside edges are slightly greater than the centre measurement, which is normal. The edges can be eased in slightly to make the quilt square. If the edge measurements are slightly different, use the smaller measurement, this is the trick to making a quilt hang straight. Work out the finished size of your quilt edge The smaller measurement will be the length of the fancy edge, less the edge of quilt seam allowance which is 3/8”, therefore 2 x 3/8” = ¾”. Our quilt measured 54 ¼” so 54 ¼” – ¾” = 53 ½”. This is our finished size. Make the template In the video you’ll see how to make a template for the picket edge. If you want, you can make your fancy edge any shape that you like such as scallops, points, a scallop and point combo or curves. (Just make sure that your valleys aren’t too deep and make a small sample first). You just have to work out a shape that divides evenly into the finished size of your quilt edge. If your quilt is made up of blocks, use the block size as a guide, for example, the finished size of my blocks are 9” so I decided on 2 pickets per block so the width of my pickets are 4 ½”. Actually, my blocks were slightly less than 9” so I made my template slightly smaller. To make the picket template as shown in the video, start with a piece of plain printer paper, fold the edge over by about 4”. Draw up the template as shown in the diagram below. Cut out the paper template and when you unfold it, it should look like the shape on the right side of the diagram. Now make the template using template plastic or cardboard. Cut the strips for the fancy edge Cut six, 4” strips for the front and another six, 4” strips for the back, cutting across the fabric from selvedge. I used a different fabric for the front and back, but you can use the same if you like. The strips will need to be joined to make 8 lengths that are approximately 2” longer than the quilt edge. (4 for the top and 4 for the back of the fancy edge). To make the required length, cut 4 strips in half and join one half onto the 8 remaining strips. Sew them right sides together with a straight join and press the seams open. Cut the batting Cut four, 3 ½” wide strips that are the same length as the fabric strips above. The batting is cut narrower to reduce the bulk in seam that joins the fancy edge onto the quilt. Mark the template Onto the wrong side of 4 of the strips, which will be the back of the fancy edge, mark 12 pickets, aligning the straight edge of the template onto one edge of the fabric. Start from the centre and work out to the edges. The drawn line is the stitching line. Measure and adjust the fancy edges to make sure that they are the correct length Measure from one end to the other of the marked picket edge. (Pencil line to pencil line). Work out the difference between your finished quilt edge measurement. Half the difference Add or subtract the difference onto each end and if necessary, reshape the ends as shown in the diagram below. Sewing the picket edging Lay a strip of batting on your table, place a front strip on top with the right side facing up, making sure that the top long edge is level, leaving a ½” gap of batting along the bottom edge. Place a back strip on top with the right side facing down, the pickets should be facing up so that the straight edge is on the bottom that has the gap of batting. Pin the layers together and stitch on the marked line. Trim back to a small ¼” seam allowance. Clip across the corners and clip into the valleys. Turn through to the right side and press. Top stitch a ¼” away from the edge of the pickets. If necessary, trim the raw straight edge level. Make all 4 fancy edges in this way. Attach to the quilt. with the quilt top facing up, mark a dot that is 1 cm (3/8”) in from each corner of the quilt, Mark the centre of each picket edging and the centre of each edge of the quilt with a pin. With the quilt top facing up and the front of the picket edge facing down, pin the picket edge onto opposite sides of the quilt first, aligning the centres and starting and finishing level with the corner dots. Ease the quilt edge in to fit the picket edging. Sew with the picket edging on top, taking a 3/8” seam allowance. Now sew the picket edges onto the remaining opposite edges in the same way, starting and finishing at the corner dots. When you flip the picket edge over to the right side it will be neat on the front and the raw seam will be on the back which will be covered by a binding in the next step. Binding Cut 6 x 2” strips, cutting across the fabric from selvedge to selvedge. Join them right sides together, with 45 degree joins to make 1 long continuous length. Trim the seams and press the strip in half lengthwise with the wrong sides facing. Sew the binding onto the quilt with a 1 cm (3/8”) seam allowance, with the right side of the quilt facing up, at this stage the binding will be on top of the picket edge with the raw edges level with the quilt edge. Sewing the binding at the corner is as simple as putting the needle in the down position and pivoting the binding and the quilt to the next edge, there is no need to make a fold as with a traditional binding. Making a nick in the binding at the pivot point allows the binding to bend around the corner with ease. Follow these simple instructions below: When you are about 4” away from the corner, make a ¼” deep nick in the binding, level with the corner dots that were marked on the quilt. Sew to level with the nick and put the needle in the down position. Pivot to the next edge of the quilt, bending the binding around the corner and onto the next edge of the quilt. Continue sewing the binding around the quilt in this way. Join the ends of the binding using your favourite method or as shown in the video. Trim away the corners from the quilt and fold the binding over to the back, pressing as you go. Pin or if necessary, tack the binding in place by hand, mitring the corners. With the back of the quilt facing up, sew close to the folded edge of the binding, on the front this will look like quilting that is sewn ½” away from the edge of the quilt and will tie in with the stitching that attached the cover strips. Complete the quilt by sewing ½” away from the quilt edge seam on all 4 picket edges to ensure that the batting is secure. Hope that you enjoyed this blog post! Monica and Alaura xo Website: www.patternpoole.com YouTube Channel: https://www.youtube.com/channel/UCNrKBP3fhaA4eqC8HLmiWnQ Facebook: https://www.facebook.com/patternpoole Join our Facebook group to share your Pattern Poole creations and connect with others: https://www.facebook.com/groups/patternpoolegroup Follow us on Instagram: https://www.instagram.com/patternpoole/
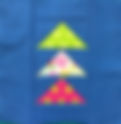
- SCRAPPY TREE AND BIRD BLOCK FOR QUILT AS YOU GO!
FREE QAYG-ALONG PART 14 These are the final 2 blocks of our free quilt as you go along. They are both stitch and flip, quilt as you go with a little bit of piecing. The tree block has a bit of crazy patchwork which is really fun and great for using up scraps, you may think that the bird block looks complicated with little pieces, but once you see it come together, you’ll find that it isn’t too difficult at all. Please note that these QAYG block are suitable to be joined together with the easy cover strip method on the back of the quilt. They can also be joined with the joining strip method, if you would like to use the joining strip method then cut your batting to the same size as the backing fabric. So, let’s start with the tree block, the cutting instructions are for 2 blocks because it’s more economical this way and you’ll see why soon. Anyway, it works out well because if you’re joining in with our FREE QAYG-ALONG then you will need to make 2. CUTTING INSTRUCTIONS FOR THE TREE BLOCK CUTTING INSTRUCTIONS ARE TO MAKE 2 BLOCKS, YOU WILL NEED ¼ YARD OR 25 CM X WOF FOR THE BACKGROUND FABRIC. BACKGROUND CUT TWO: 5 ¾” X 6 ¾” RECTANGLES (SIDE OF TREE) CUT FOUR: 1 ¾” X 3 ¾” RECTANGLES (TRUNK SECTION) CUT FOUR: 2” X 7 ¾” RECTANGLES (SIDE BORDERS) CUT FOUR: 2” X 10 ½” RECTANGLES (TOP AND BOTTOM BORDERS) TRUNK CUT ONE: 1 ½” X 1 ¾” RECTANGLE TREE 7 OR 8 GREEN FABRIC SCRAPS BACKING CUT ONE: 10” SQUARE BATTING CUT ONE: 9” SQUARE So back to why this block is more economical to make two with the same background fabric and this is because of the way that the two, 5 ¾ by 6 ¾ rectangles are cut to make the side edges of the tree. Now this part is important, place them with the wrong sides facing and measure an 1 ½” across the top short end and an 1 ½” across the bottom, measuring from the opposite side. Connect the marks with your ruler and cut. This will give you a pair of side pieces for one block, and a pair for another block. Mark up the block Position your backing fabric with the wrong side facing up and centre the batting on top so that you have a ½” gap around all 4 side edges. If you like you can hold the layers together with a light application of quilt basting spray. Mark up the block as shown in the diagram below: Set up your machine Thread your machine with a neutral-coloured thread, choose a thread that will also blend with your backing fabric and insert a size 80 quilting needle. I like to use a stitch length of 3 when sewing through batting, this is slightly longer than the regular length. Attach your ¼” foot or use your standard foot with the needle position moved over to give you a measurement of a ¼” between the needle and the edge of the foot. Stitch and flip rules So that the stitches don’t cross over on the back and look messy, mark the start and finish of every row of stitching with a dot that is a ¼” away from the edge of the underneath fabric. Sew from dot to dot beginning and ending each row with an automatic tie off, if you don’t have this function on your machine, use a little reverse stitch. Press each seam as you go using the tip of your iron, being careful not to touch the batting just in case your batting does not like the iron. (This is why I recommend using cotton batting) Watch the video below to make the block, here are some step-by-step photos to keep you on track: Piece together the tree trunk section before stitching and flipping it onto the bottom of the tree. Now to make the bird block, if you're joining in with our FREE QUILT AS YOU GO ALONG, you'll need to make 2. BIRD BLOCK CUTTING INSTRUCTIONS ARE TO MAKE 1 BLOCK. TO MAKE 1 BLOCK YOU WILL NEED 6” X 26” OF BACKGROUND FABRIC, TO MAKE 2 YOU WILL NEED A ¼ YARD OR 25 CM X WOF. BACKGROUND CUT ONE: 6” SQUARE CUT THIS SQUARE ONCE ON THE DIAGONAL TO MAKE 2 TRIANGLES, YOU ONLY NEED 1 PER BIRD. CUT THREE: 1 ½” SQUARES CUT ONE: 1 ½” X 1 ¾” RECTANGLE (BEAK SECTION) CUT ONE: 1 ½” X 4 ½” RECTANGLE (BEAK SECTION) CUT TWO: 1” X 2 ½” RECTANGLES (1 FOR SMALL TRIANGLE ABOVE HEAD, 1 FOR BETWEEN LEGS)) CUT ONE: 2 ½” X 3” RECTANGLE (FRONT LEG AND TAIL SECTION) CUT ONE: 2 ½” X 4” RECTANGLE (BACK LEG AND TAIL SECTION) CUT TWO: 2” X 7 ¾” RECTANGLES (SIDE BORDERS) CUT TWO: 2” X 10 ½” RECTANGLES (TOP AND BOTTOM BORDERS) BIRD BODY (DARK BLUE) CUT ONE: 2 ½” X 5” RECTANGLE (MAIN BIRD BODY) CUT ONE: 1 ½” SQUARE (TRIANGLE NEAR WING) CUT ONE: 2 ½” SQUARE (TAIL FEATHER) WING (LIGHT BLUE) 4 7/8” SQUARE CUT THIS SQUARE ONCE ON THE DIAGONAL TO MAKE 2 TRIANGLES, YOU ONLY NEED 1 PER BIRD. LEGS AND BEAK (RED) CUT ONE: 1” SQUARE (BEAK) CUT TWO: ¾” X 2 ½” RECTANGLES (LEGS) BACKING CUT ONE: 10” SQUARE BATTING CUT ONE: 9” SQUARE Mark up the block Position your backing fabric with the wrong side facing up and centre the batting on top so that you have a ½” gap around all 4 side edges. If you like you can hold the layers together with a light application of quilt basting spray. Mark up the block as shown in the diagram below: Watch the video below to make the block, here are some step-by-step photos to keep you on track: (If you're feeling adventurous, you can reverse your second bird block by reversing the marks from the left side to the right side of the block) Trim your blocks back to the same size as the backing fabric, before we join them together they will all be measured and trimmed to 9 3/4" square. Here are the blocks all together! I'm going to let them sit on the design wall for a few days while I think about perhaps changing some of the fabrics. I'm really happy with how all the blocks looks together. In the next video, I'll show you how to join them all together with the Easy Cover Strip Method on the back. Alaura and I will be taking a week off from filming so the next vidoe will be out at the end of the month. Have a creative weekend! Monica and Alaura xo Check out the Pattern Poole website
- RETRO FLOWER STITCH N FLIP QUILT BLOCK!
FREE QAYG ALONG PART 13 Alaura has been asking me to make this block since the beginning of our QAYG-ALONG, Alaura is big on researching and keeping up to date with the latest trends and she can tell you that the retro flower is a popular motif on textiles and homewares at the moment. Depending on your age, you may have lived through the flower power era, where the flower was an iconic symbol of peace, love and harmony and was literally on every textile that you owned from clothing to homewares. There’s no doubt that flowers are beautiful, so here is our version of a retro flower patchwork block. This is another stich and flip, QAYG design that would look great as a repetitive design in a quilt. Please note that this QAYG block is suitable to be joined together with the easy cover strip method on the back of the quilt. They can also be joined with the joining strip method, if you would like to use the joining strip method then cut your batting to the same size as the backing fabric. Here are the cutting instructions to make 1 block, if you’re joining in with our FREE QAYG-ALONG then you’ll need to make 2. CENTRE SQUARE CUT ONE: 3” SQUARE DARK PINK CUT FOUR: 1 1/8” SQUARES MEDIUM PINK CUT TWO: 1 ¾” X 3” RECTANGLES CUT TWO: 1 ¾” X 5 ½” RECTANGLES LIGHT PINK CUT FOUR: 1 1/8” SQUARES CUT EIGHT: 1 ¾” X 3” RECTANGLES BACKGROUND CUT SIXTEEN: 1 1/8” SQUARES CUT FOUR: 1 3/4" SQUARES CUT TWO: 1 ¾” X 8” RECTANGLES CUT TWO: 1 ¾” X 10 ¼” RECTANGLES BACKING CUT ONE: 10” SQUARE BATTING CUT ONE: 9” SQUARE Mark up the block Position your backing fabric with the wrong side facing up and centre the batting on top so that you have a ½” gap around all 4 side edges. If you like you can hold the layers together with a light application of quilt basting spray. Mark up the block as shown in the diagram below: Watch the video below to make the block, below are some step-by-step photos to keep you on track. We hope that you enjoy this block! This is our quilt so far, I'm still not sure how I'm going to position the blocks yet. Only 4 more to go! Happy sewing, Monica and Alaura xo
- THE QUILT BLOCK CENTRE STAR YOU NEED!
FREE QAYG ALONG PART 12 The interesting thing about this block is it is actually made up of 4 blocks rotated to create the starburst design. I wanted to design something special for the centre of the quilt to be the main focal point with all of the other blocks floating around the edge. And it can make a great repetitive pattern for a quilt-as-you-go quilt! Check out how stunning this design looks in a full king-sized quilt-as-you-go quilt made by Patrice Dodd! Isn't it amazing? Read on to see how to make your own Starburst block! At first glance, this block might look a little confusing, but when you break it down, it starts with a simple triangle template that forms the diamond centre with all the other pieces stitched and flipped around the edge. Read on to see how easy it is to make the template and the block. This is another stich and flip, QAYG design that would look great as a cushion or as a repetitive design in a quilt. Please note that these QAYG blocks are suitable to be joined together with the easy cover strip method on the front or on the back of the quilt. They can also be joined with the joining strip method , if you would like to use the joining strip method then cut your batting to the same size as the backing fabric. Here are the cutting instructions to make 1 block, if you’re joining in with our FREE QAYG-ALONG then you’ll need to make 4. I made each block in a different fabric combination to tie in with my whimsical scrap quilt theme but if you prefer a more organised look, you could make each block in the same fabric combination. There will be some leftover scraps when your blocks are complete so save them because we’ll make a video on crumb quilting in the future. CENTRE DIAMOND ( CHOOSE 2 FABRICS) MAKE THE TRIANGLE TEMPLATE AS INSTRUCTED BELOW CUT 1 TRIANGLE FROM EACH FABRIC DIAMOND BORDER CUT TWO: 1 ½” X 5 ¼” RECTANGLES CUT TWO: 1 ½” X 7 ½” RECTANGLES STAR PONTS (CHOOSE 2 FABRICS) SHORTER BOTTOM STAR POINT CUT ONE: 3” X 9” RECTANGLE LONGER SIDE STAR POINT CUT ONE: 3” X 10” RECTANGLE BACKGROUND FABRIC (NON-DIRECTIONAL PRINT) CUT TWO: 3” X 8” RECTANGLES (8" is economical and just fits, cut at 9" if you like) CUT ONE: 5 ¾” SQUARE (CUT THE SQUARE ONCE ON THE DIAGONAL) BACKING CUT ONE: 10” SQUARE BATTING CUT ONE: 9” SQUARE How to make the template To make the template you will need a sheet of plain printer paper. Fold one edge over by about 3” making sure it is nice and level on both side edges. Measure and mark a dot that is 2 3/8” from the fold across the bottom edge using a nice sharp pencil. From the bottom edge, measure 3 7/8” up the folded edge and mark a dot. Connect the dots and draw a line. Cut on the line with a rotary cutter or scissors. (I have a rotary cutter that I use for paper only) Unfold the paper and you will have a triangle, it should measure 4 ¾” across the bottom and be 3 7/8” high. Make sure you label the bottom edge and mark the grainline on the centre crease. This is important so you don’t get the sides of the triangle mixed up. (The sides will be stretchy because they are cut on the bias grain). Cut out the triangles Cut out 2 triangles from 2 different fabrics. To do this, take your 2 pieces of fabric, place them together with the wrong sides facing up, place your paper template on top and hold in place with some dots of fabric glue. Cut around the template with a rotary cutter. (I worked with the wrong side of the fabric facing up so that I didn’t get glue on the right side of my fabric). Of course, if you want to, you can fussy cut your pieces separately. Mark the bottom edge of the fabric triangles so that you don’t get them mixed up. Mark up the block Position your backing fabric with the wrong side facing up and centre the batting on top so that you have a ½” gap around all 4 side edges. If you like you can hold the layers together with a light application of quilt basting spray. To mark up the block, first of all, draw a diagonal line from corner to corner, and then draw a diagonal line from the opposite corner to corner making an X. I used a sharp 4B lead pencil, this is a soft lead and it marks easily onto the batting. Don’t press too hard as dark lines can show through on lighter fabrics. Now, from the top corner, measure down 4 ¼”and make a mark, from the same corner measure across 4 ¼” on the top edge and make a mark. Connect the marks and draw a diagonal line. Do the same to the opposite corner. Mark a line that is a quarter inch below the diagonal line as shown in the diagram below, mark this line 2” either side of the centre line. Set up your machine Thread your machine with a neutral-coloured thread, choose a thread that will also blend with your backing fabric and insert a size 80 quilting needle. I like to use a stitch length of 3 when sewing through batting, this is slightly longer than the regular length. Attach your ¼” foot or use your standard foot with the needle position moved over to give you a measurement of a ¼” between the needle and the edge of the foot. Before you start your block, here are some stitch n flip tips. 1. So that the stitches don’t cross over on the back and look messy, mark the start and finish of every row of stitching with a dot that is a ¼” away from the edge of the underneath fabric. 2. Sew from dot to dot beginning and ending each row with an automatic tie off, if you don’t have this function on your machine, use a little reverse stitch. 3. Trim all excess fabric back to a ¼” seam allowance as you go, especially dark fabrics as they could show through the light fabrics on top. 4. Press each seam as you go using the tip of your iron, being careful not to touch the batting just in case your batting does not like the iron. (This is why I recommend using a cotton batting) How to make the block Take one triangle and fold it in half across the bottom edge and make a crease, align the bottom edge of the triangle with the 1/4" line, aligning the centre crease with the centre diagonal line. Make sure that the top point of the triangle is also aligned with the centre diagonal line. Take your other triangle and place it on top with the right side facing down, making sure that all edges are aligned. Mark 2 dots that are a ¼” in from both opposite ends on the bottom edge of the triangles. Sew from dot. Flip the top triangle over to the right side. Gently press the seam. Use a little fabric glue to hold the points in place so that they are perfectly aligned with the centre marked lines. Sew the diamond border strips onto the edges of the centre diamond, starting with the shorter strips on opposite side edges. Position all border strips a ¼” past the side edges of the diamond, this will allow extra fabric at the top and bottom to form the diamond points when the strips have been flipped to the right side. When the shorter border strips have been stitched, flip them to the right side and press. Stitch and flip the longer border strips in the same way. Trim the excess length of the longer border strips to the diamond shape. To do this, place your ruler along the outer edge of the shorter border strips and mark a line that extends across the longer strips making the points. If the border strips are not long enough to make the points you will need to unpick and move them up. Do the same on the other side. Cut on the marked lines. Align the outer points of the diamond with the marked diagonal lines and hold in place with some dots of glue. Sew the background rectangles onto the top side edges of the diamond. To do this, place the first strip right sides together with the first edge, positioning it a ¼” below the side corner and a ¼” above the edge of the backing fabric. Mark the ¼” dots then stitch, flip and press. Position the other background rectangle onto the opposite top side edge in the same way. Mark the ¼” dot at the side of the diamond only then stitch from the dot to the outer edge of the backing square. When flipped, this piece should cover the corner of the backing square. Trim the excess fabric from the seam and press. Flip the block to the back and trim level with the backing square. Sew the shorter star point rectangle onto the lower right-side edge of the diamond. To do this, place the rectangle right sides together with the diamond, positioning the bottom edge of the strip level with the batting that is ½” away from the backing fabric and making sure that the top of the strip extends past the side diagonal line. Mark the top dot a ¼”away from the side diagonal line and the bottom dot a ¼”away from the diamond point. Stitch from dot to dot, flip and press. Sew the longer star point rectangle onto the lower left edge of the diamond. To do this, place the rectangle right sides together with the diamond, positioning the bottom edge of the strip a ¼”past the backing fabric and making sure that the top of the strip extends past the side diagonal line. Mark the top dot a ¼” away from the side diagonal line only. Rotate the block and start sewing level with the backing square and finishing at the dot. Check that when you flip this strip, the right bottom corner of the block is covered. Trim and press. Flip your block over to the back and trim the excess fabric level with the backing square. Remark the side corner lines, lift the fabric up to make sure you are marking the line correctly, and then trim away the excess fabric cutting on the marked line. Sew on the side triangles. To do this, place a triangle right sides together with your block, Gently fold the bias edge in half and finger crease to indicate the centre, align the centre crease with the centre diagonal line on the batting and pin it in place. Position the opposite triangle in the same way. Stitch the triangles, sewing from edge to edge of the block. Flip the triangles and press. Turn your block over to the back and trim level with the backing square and here is our finished block. Make all of your blocks in the same order, just like the log cabin block . Rotate the blocks to form the star desi gn. At this stage I am just trimming all my blocks to the same size as the backing square but I will measure all of my blocks and trim them to the same size before joining them together. You can expect some shrinkage when making stitch and flip QAYG blocks, it’s looking like mine will all be trimmed to 9 3/4” square. Here are all of my blocks positioned around the centre star, I'm still not sure what order they will go in. Only 6 blocks to go! Watch the video tutorial to see how it is done! Have fun making this xx
- THE EASIEST QUILT BLOCK TO MAKE -THE STRING BLOCK
FREE QAYG ALONG PART 11 We’re obsessed with string quilts! And they are super easy, super fun and beginner friendly, so we thought you might like to make one too. This week we were invited to make some short videos for Spotlight’s Quilting Expo, so we went totally over the top and made a 3 part series on how to make a quilt as you go string quilt from start to finish. This series is perfect for the very beginner or for those that want to try their hand at making a quilt as you go quilt. It’s full of tips and tricks to help enhance your patchwork, quilting and sewing skills. Can you beleive that this 1 simple block, pictured below, made this modern string quilt? Episode 1 is available to watch now and starts with the basics and how to make the blocks. (You’ll find the link to the video below) Episode 2 will be available soon and shows how to join the complete quilt together using our Easy Cover Strip method with the strips on the back so that there is no interruption between the blocks. Episode 3 will be out next week and in this video, you’ll see a new machine sewn binding method that ties in perfectly with the cover strips on the back of the quilt. There is also a free pattern that you can download here: So, for those joining in with our free QUILT AS YOU GO ALONG, we have a challenge for you! Watch episode 1 of How to Make a Quilt from Start to Finish, then make a string block of your choice, the strips can be all the same width or different widths, we’d love to see what you come up with so please share them in the Pattern Poole Sewing Facebook group. You will need to make 2. There is no specific video for part 11 of the free QUILT AS YOU GO ALONG, but you’ll get all the tips that you need from episode 1 of How to Make a Quilt from Start to Finish. This is how we made our string blocks. We used leftover strips that were all 1 ½” wide and various lengths. Start with the usual 10” backing square with the wrong side facing up with the 9” square of batting centred on top. Mark a line that is a ¼” away from opposite diagonal corners. Place your first strip onto the block with the right side facing up, positioning it above the marked line so that the corners of the block are covered and making sure that the lower edge of the strip is level with the marked line. Place another strip on top with the right side facing down. Pin in place and stitch with a ¼” seam allowance, sewing through all layers. Start and finish level with the edge of the backing fabric, there is no need to back tack or reverse at the beginning and end of each row of stitching at this stage. Flip the top strip and press, continue stitching and flipping the strips onto the block. When your block is complete, trim it to the same size as the baking square. If you have just found us, we are Pattern Poole, a Mother (Monica) and Daughter (Alaura) design team from Australia, we have a fantasic YouTube channel with free quilting tutorials, a supportive Facebook group and a website that has a giant pool of sewing patterns. Add 4 PDF patterns to your cart and you'll get 1 for free when you enter the code FREEPATTERN at the checkout, We hope that you enjoy the video!
- A TRADITIONAL BLOCK TURNED QUILT AS YOU GO - THE FLYING GEESE BLOCK
FREE QAYG-ALONG PART 10 This week we take another traditional block and we make it quilt as you go! There are many different variations of this design, but we have made a 10” block to fit in with our QUILT AS YOU GO ALONG. Once again, this is another fun stitch n flip block that would look fantastic as a repetitive design with the geese flying in all different directions. Please note that these QAYG blocks are suitable for the easy cover strip method with the cover strip on the front or the back of the quilt. They can also be joined with the joining strip method , if you would like to use the joining strip method then cut your batting to the same size as the backing fabric. Below are the cutting instructions to make 1 block, if you’re joining in with our FREE QAYG-ALONG then you’ll need to make 2. Please note: The six 2 7/8” background squares are cut 1/8” bigger to make sewing the points easy. Technically they should be 2 ¾” squares. The block on the left was made with 2 7/8” background squares, you’ll see that there is a small space of background fabric between the points and the next triangle. The block on the right was made with 2 ¾” background squares and there is no gap between the triangles. It’s up to you if you would like to take on the challenge of the 2 ¾” squares. Follow along with the YouTube video below to make your block. This is how to mark up the block: Here are some step-by-step photos on how to make one Flying Geese triangle, repeat the steps to make 3. Trim the excess fabric a 1/4" away from the stitching line before folding the background fabric over to form a triangle. So here are my 24 blocks so far, they are positioned in no particular order, I think that I need 1 more block with a dark blue background to balance things out. 12 more blocks to go! We hope that you are enjoying theses QAYG blocks as much as we are! Happy quilting! Monica and Alaura xo
- YOU'LL BE A FAN OF THIS QUIRKY FAN BLOCK FOR QUILT AS YOU GO!
FREE QUILT AS YOU GO ALONG PART 9. I hope that you have been enjoying our FREE QAYG-ALONG! Whilst I've given you all the challenge of following along and making the blocks, I've also given myself the challenge of designing some new, different, stitch n flip, quilt as you go blocks. This style of quilting is kind of like foundation paper piecing but instead I'm using the batting and backing as the foundation. So, this week, I hope that you enjoy my quirky fan block. Once again, this design would look great as a repetitive design in a QAYG quilt or if you're joining in with our QAYG-Along, you'll need to make 2. No time to join in? No problem, we hope that you enjoy the video anyway and perhaps pick up a few tips that may help you to learn or improve your sewing skills. Please note that this blocks starts at 10" and is suitable to be joined together with my easy cover strip method or with the regular joining strip method. If you would like to use the regular joining strip method then cut your batting to the same size as your backing fabric. This is what you will need to make 1 block: Follow along with the video below to see how to make the block. The video will show you how to make a wedge shape template for the fan pieces, it should be the size as shown in the diagram below: This is how to mark up the block to prepare for stitching and flipping: Here are some step by step photos to keep you on track. I loved making this block so much that I made 4! Fans in a row, fans facing in and fans facing out, there are a lot of possibilities with this block. If I made this a repetitive design in a quilt, I think that I would join them together with the easy cover strip method on the front to break them up. What do you think? A big shout out to my daughter Alaura for all her hard work in filming, editing and directing yet another fun and creative video! Happy sewing! Monica xo
- THE CLASSIC FRENCH BRAID
FREE QAYG-ALONG PART 3. A quilt block that takes its name from a fancy hairstyle, yes, please! The French Braid block is a classic quilt block that gives the illusion of woven strands, and even though it looks quite intricate, we guarantee that it is easy enough for the very beginner quilter. This quilt block can be used to make a repeat pattern and joined together with our Easy Cover Strip method to make a stunning quilt-as-you-go quilt! So, what are you waiting for? Check out our free tutorial on how to make this block! If you're joining in with our QAYG-ALONG you'll need to make 2 French Braid blocks. Below is the requirements list to make 1 block, you'll need to multiply what's on the list by 2 except for the starting triangle because you'll get 2 triangles from the 4" square when it's cut on the diagonal. The French Braid also looks great with every piece in a different fabric for a scrappy look, we can't wait to see what you do with your block! Don't forget to use #PatternPooleQAYGalong2021 when posting your photos on social media. Follow the YouTube video to make your block. I hope that you love making this block as much as I did!
- A FUN CRAZY PATCHWORK FLOWER BLOCK YOU HAVE TO MAKE!
FREE QUILT AS YOU GO ALONG PART 8 This week we have some fun with crazy patchwork. Crazy Patchwork has been around for centuries, it’s the process of joining small scraps of fabric together to make 1 complete textile piece. This crazy flower block would look fantastic as a scrappy repetitive design in a quilt! If you’re joining in with our FREE QUILT AS YOU GO ALONG you will need to make 2. We now have 20 blocks made for our FREE QUILT AS YOU GO ALONG. Here are my blocks so far in no particular order. 16 more blocks to go, making a total of 36 blocks that will make a pretty lap size quilt. If you want to know more about our FREE QUILT AS YOU GO ALONG, click here. This is what you will need to make 1 block. Please note that this block starts at 10” and is designed to be joined together with my Easy Cover Strip Method , with the cover strip on the front or on the back of the quilt. The blocks can also be joined with the Joining Strip Technique . If you want to use the Joining Strip Technique, cut your batting to the same size as the backing square. Follow along with the YouTube video below to see how to make your crazy patchwork block. I love crazy Patchwork! Here are some photos of where I have used it in some of my other quilts: The moon in our Twilight Dreaming Quilt, 2020, available as a PDF pattern. A vase from my Blossom quilt, 2010. I should make this quilt into a PDF pattern, let me know what you think. A heart and a flower centre from my Precious Pieces quilt, 2005. Available as a printed pattern, I might also make this a PDF pattern too. The Sweet n Sassy quilt as you go quilt, 2005. Available as a PDF pattern , we also have a how to video on YouTube for this quilt. We hope that you enjoy this week's block. Happy sewing, Monica and Alaura xo
- THE HEART BLOCK OF MY DREAMS
FREE QAYG-ALONG PART 7. You'll fall in love with this pretty heart block that is quick and easy and perfect for small scraps of fabric. This block would look great as a repetitive design in a quilt as you go quilt or 4 blocks would make a lovely cushion. Click on the video below to see how to make it. If you're joining in with our FREE QUILT AS YOU GO ALONG, you'll need to make 2 heart blocks. Just found out about our FREE QUILT AS YOU GO ALONG? You can start anytime. Read all about it here. Here are the cutting instructions to make 1 block, if you’re joining in with our FREE QAYG-ALONG then you’ll need to make 2. Please note that these QAYG blocks are suitable for the easy cover strip method with the cover strip on the front or the back of the quilt. They can also be joined with the joining strip method, if you would like to use the joining strip method then cut your batting to the same size as the backing fabric. Follow along with the YouTube video to make your block, you'll be surprised at how easy it is! If you enjoy our videos, please subscribe to our YouTube channel, click LIKE on the video and share it to a friend that also loves to sew. We appreciate your support and this helps our small business to grow. If you like our designs, check out our range of instant downloadable PDF patterns on our website here. Hope that you enjoy making this pretty heart block. Feel free to post it in the Pattern Poole Sewing Facebook group. Happy sewing! Monica and Alaura xo
- AN ELEGANT TULIP BLOCK PERFECT FOR QUILT AS YOU GO!
FREE QAYG ALONG PART 6 This week we take a traditional block and make it quilt as you go! We think that this block would make a very cute, repetitive design in a scrappy style quilt. New to our QAYG-ALONG? You can read all about it here. Here are the cutting instructions to make 1 block, if you’re joining in with our FREE QAYG-ALONG then you’ll need to make 2. Please note that these QAYG blocks are suitable for the easy cover strip method with the cover strip on the front or the back of the quilt. They can also be joined with the joining strip method , if you would like to use the joining strip method then cut your batting to the same size as the backing fabric. Follow along with the YouTube video to make your block. This is how to mark up the block: Here are some step-by-step photos to keep you on track when making your tulip block. Lay all of the pieces out to make sure that they are in the correct order before you begin to sew. Here are some tips: When you flip your pointy tulip pieces over, make sure that the points finish 1/4" away from the raw edge. When you have sewn the first 4 pieces around the yellow square, make sure that all outer corners are aligned with the vertical and horizontal marked lines. Use a dab of fabric glue to hold them in place before you sew on the next round. Hope that you enjoyed making this QAYG block as much as I did! By the way, if you have just found us, we are Pattern Poole, a Mother and Daughter Design team from Australia. We have a fun YouTube channel with interesting and educational quilting tutorials, a beautiful website full of PDF patterns that include quilt as you go quilts and loveable applique designs and a supportive Facebook group where you can ask questions and share your Pattern Poole creations. Thanks for stopping by! Monica and Alaura xo
- THE TIMELESS HOUSE BLOCK
QUILT AS YOU GO FRIENDLY FREE QUILT AS YOU GO ALONG PART 5 They say home is where the heart is, but I say, home is where my quilts are! And nothing creates the homely vibe like this cute little house block. This block is also stitch n flip, plus quilt as you go friendly. Read on to see how you can make your own house block or even house quilt! Here are the cutting instructions to make 1 block, if you’re joining in with our FREE QAYG-ALONG then you’ll need to make 2. The house block finishes at approximately 10" square. Below is a picture of my second block. Please note that these QAYG blocks are suitable to be joined together with the easy cover strip method . The cover strip can be on the front or the back of the quilt. They can also be joined with the joining strip method , if you would like to use the joining strip method then cut your batting to the same size as the backing fabric. Follow along with the YouTube video to make your block. Click on the video to see when it premieres where you are. This is how to mark up the block: This is the order in which the pieces are stitched and flipped onto the batting and backing square. Here are some step-by-step photos to keep you on track when making your house block. Feel free to join our private Facebook group to share pics of your house blocks, we'd love to see them! Don't forget #patternpooleqaygalong2021 when posting to your socials. Love quilt as you go? Check out our range of QAYG PDF patterns on our website here.
- WHAT'S THE DEAL WITH STAR BLOCKS AND QUILT AS YOU GO?
FREE QAYG-ALONG PART 4 - THE QUILT AS YOU GO FRIENDLY STAR BLOCK. So why do I call this a QAYG-friendly star block? Most patchwork star blocks have the same thing in common, they have points that finish a ¼” away from the edge. This means that they are not suitable for my Easy Cover Strip method because when the cover strip is sewn between the blocks, it will cover the points; even if the cover strip is sewn on the back, the points won’t be pointy because I like to take a 3/8” seam allowance to make the seam press nice and flat before the strip covers it. If I wanted to join regular star blocks with the easy cover strip method, I would sew a border around the outer edge of the block before I quilted it and joined it with the ECM just like I did with the Paradisio quilt pictured below. It's difficult to see the border seam, but it's just to the right of the striped cover strip. Now, I’m not saying that you can’t quilt as you go with regular star blocks or any block for that matter that has points that finish a ¼” away from the edge, I used the joining strip method to join these blocks together for the joining strip video. This technique uses a ¼” seam allowance. The video is below, just in case you missed it. I also used the same star block to demonstrate my 1 to 3 quilt as you go joining technique. This technique also uses a ¼” seam allowance, although my accuracy wasn’t so good on the day because my points did get cut off slightly (Woops). Once again, the video tutorial is below if you missed it. In my QAYG without sashing video, I refer to joining applique blocks together and I take a 3/8” seam allowance. Sometimes I do this just for ease because it means that I can cut all edges of the quilt sandwich level and the 3/8” seam gives me enough fabric to fold over on the back for a nice secure join. If I was to use the no sashing technique for regular star blocks, I would cut my batting and backing bigger (about 1” all around the edge) and after quilting the block, making sure that I don’t quilt all the way to the outer edges, because that’s the rule for this method, I would trim the batting and backing so that it extends ¼” past the edge of the star block. I would then join them together in the same way that I show in the video, only taking a ¼” seam allowance to sew the tops together, leaving me extra backing fabric to fold over and hand sew on the back. If you’re feeling a little confused, watch the video below. Here’s another idea, for any patchwork block, rather than quilting each star block separately, you could join them in rows or sections that you find comfortable to quilt. Leave about 2” free of quilting away from the edges to be joined and then join your sections together with either the no sashing technique as discussed above or the 1 to 3 method, then frame you quilt with the Easy Border technique. (The video tutorial is below) Wow, so what started out as a quick blog post has turned into a full on, quilt as you go lecture! I hope that you found it informative! I've been designing quilt as you go quilts and patterns for over 20 years, if you'd like some inspiration, check out my website. We now offer instant PDF patterns worldwide. Below is the cutting instructions to make 1 block but If you’re joining in our FREE QAYG-ALONG then you’ll need to make 2. Watch the video below to see how to make the star block. (It will be premiering at the usual time). If you would like to know more about why I call this a QAYG friendly star block, then keep on reading below. Cheers! Monica xo
- A SCRAPPY, KIND OF WONKY LOG CABIN BLOCK.
Part 2 of our FREE QAYG-ALONG 2021 The log cabin block is perfect for quilt as you go! In this video tutorial, I show how to piece a log cabin block in the regular way and talk about how you can join quilted log cabin blocks together without sashing. Then I show how to stitch n flip a log cabin block onto batting and backing to make a wonky QAYG log cabin block. A wonky log cabin block is a fun and easy way to let go of perfection and have fun stitching n flipping! We hope you enjoy this tutorial! Click the video below to watch the tutorial on our YouTube channel!
- EVERYTHING YOU NEED TO KNOW ABOUT ISLAND HOME!
Our Island Home YouTube series has finished, but this is not the end! Now the course is complete; we can run another sew-along! In this post, we have compiled the top questions asked about our Island Home course and how you can join the sew-along. Read on for more details. Quilting is one of the most transcendent art forms there is; it combines the practice of drawing, design, mathematics and textiles to create a functional piece of art that can wrap around your loved ones and be cherished for years to come. Here at Pattern Poole, we are all about quilt-as-you-go; we believe it helps make the satisfying and therapeutic art of quilting accessible to anyone. With quilt-as-you-go, you can make your own quilts from start to finish, and we think that is really empowering. We are so passionate about quilt-as-you-go that we focused our 4th ever online course, 'Island Home,' all about it. We also decided to make the videos accessible for anyone to watch on our YouTube channel. Even though we originally ran this course as a mystery, with all the video tutorials on our channel, there are no secrets about what you will learn. All the wealth of information will always be available for you to watch, anywhere and at any time. We have created course notes to accompany each video, each with detailed step-by-step instructions and colour photos; as we know, there are many different types of learners out there. The profits help keep our channel running so we can continue to make many tutorials in the years to come. We hope you join the Pattern Poole family and embark on a fun quilting journey with many like-minded wonderful people and us worldwide. With the changes in the world happening all around us, our goal is to create a supportive online community of members worldwide. GOOD NEWS We are running another sew-along for this course starting in October 2022. So this is everything you need to know to start preparing! HOW WILL THE SEW-ALONG RUN? Starting October 19, each fortnight at 12 pm (Sydney Australia time), we will be sharing a blog post for each part of the quilt. (There are 14 parts). Each blog post will have a rundown of what you can expect to learn and some extra tips if required. Read the blog post before watching the original pre-taped YouTube video. There are 2 ways to get the PDF course notes: 1. Purchase and download 1 part at a time from our website for $10 each. (Therer are 14 parts) Subscribe to our email newsletter to receive the fortnightly blog post in your inbox. 2. Pay 1 upfront fee of $125 to join the Island Home Private Facebook Group where you can download the course notes. The fortnightly blog post will be posted in the private Facebook group. WHAT IS THE FINISHED SIZE OF THE QUILT? The finished quilt size is 56 ½" x 61 ½" (143 cm x 154 cm) TELL ME MORE ABOUT THE ALEX BIRDFOX FABRIC PANEL USED IN THE QUILT: Alex Birdfox is a First Nations Indigenous Artist from the Wiradjuri. Alex creates art that intertwines science and metaphysics, depicting journies through time-space. Alex has designed a fabric panel specifically for the Island Home quilt. The patterns and textures are based on the sacred land we live on here in Australia. The panel features intricate dot work and line designs that you will find on the ancient rock formations, native flora and amazing rivers here in Australia. We decided to print this wonderful work of art ourselves here in Australia to truly create a product that fits with our values of sustainability. The panel is printed here in Sydney, and after three runs, we have listened to your feedback and found a new supplier that can print the colours more vividly. The Island Home fabric quilt panel features 16 designs; each piece measures 23 cm x 33 cm (9" x 13") and is perfect for patchwork and applique. The panel size is 97 cm x 138 cm (38 1/4" x 54 1/4") The 4th print run is now available to purchase here HOW MANY PARTS ARE TO THE COURSE? There are 14 video tutorials on YouTube and 14 sets of course notes. HOW CAN I ACCESS THE VIDEOS?: You can access all the videos on our YouTube channel Pattern Poole TV. We have a playlist here where all the videos are in order. WILL THE VIDEOS ALWAYS BE THERE? Yes, the videos will remain on YouTube indefinitely. HOW DO I SIGN UP? You can sign up on our website in two ways: As a Facebook Member ($125 AUD) Or pay-as-you-go and purchase the course notes separately. There are 14 sets of course notes that are $10 AUD each. (Total is $140 AUD) HOW DOES THE ISLAND HOME FACEBOOK MEMBER WORK? Facebook groups have changed how we find and share information and make connections worldwide. The Island Home Facebook Member is for those who use Facebook. When you purchase this option, you will receive a PDF download with a link to access the private group. Once approved, you can access all the videos and course notes via the clear and easy Guides Tab in the Facebook group. You will also be able to ask questions, share your work and see what others are doing. We take great pride in managing our Facebook groups to protect them from hackers. HOW DOES THE PAY-AS-YOU-GO OPTION WORK? The pay-as-you-go option is a flexible option for anyone who: Wants to pick and choose the parts of the course that interest them. Doesn't have Facebook. Likes to work at their own pace. Enjoys interacting on a blog, reading blog posts and connecting in a blog community format. Simply head to the Island Home Journal, where the course is broken down into numbered sections. Each journal entry has a link to the video, the course notes and an area for you to comment and share photos of your work. Or head to the Course Notes section on the website and purchase the course notes at your own pace. I AM DOING THE PAY-AS-YOU-GO OPTION; HOW DO I ASK A QUESTION?: You can head to our Island Home Journal and ask a question on the Journal entry that your query relates to. This way, other people may have the same question, and everyone following along can see. Or you can also send us an email at studio@patternpoole.com I CAN'T LOG IN TO THE COURSE NOTES (MEMBERS ONLY) SECTION ON THE WEBSITE: This section is only available to those early bird members who signed up in January 2022 for access. This option is no longer available for other members to access. WHAT SKILL LEVEL IS THE COURSE TAILORED FOR? Beginners to advanced quilters. Please note: Beginners will need basic sewing machine skills and know how to cut out with a rotary cutter, as rotary cutting skills are not covered in this course. WHAT PREREQUISITES DO I NEED? You will need to know how to use a domestic sewing machine and how to cut out with a rotary cutter. WHAT KIND OF SEWING MACHINE DO I NEED? A basic domestic sewing machine that is in good working order. For the applique, your machine will need the capability to either zig zag or blanket stitch. Additional machine accessories of a ¼" foot, an open-toe foot and a walking foot are also required. Please contact your local sewing machine dealer to purchase additional accessories if required. WHAT TOOLS WILL I NEED? You will need basic patchwork and quilting equipment. We have stuck to the basics and will not try to sell you additional tools to do the quilt-as-you-go methods. You can see what you need in the requirements list. TELL ME MORE ABOUT THE OTHER FABRICS I WILL NEED: For the success of your quilt, we recommend 100% cotton patchwork and quilting fabric. We cater for all budgets. You can either buy all new fabrics as stated in the requirements list or use fabric from your stash; just make sure that the background (top) fabric is a good quality solid cotton fabric, and avoid thin or open weave fabrics as they could stretch out of shape or fray on the edges. DOES THE PRICE INCLUDE FABRIC AND SUPPLIES? No CAN I PURCHASE A KIT? Unfortunately, we are a small business and don't have the capabilities to store stock and ship worldwide. We encourage you to shop local and support the quilt stores. WHO IS THE TUTOR? Monica Poole is a designer and sewing tutor from Australia. Sewing and teaching others to sew is her passion. Monica's Mum encouraged her to pursue a career in fashion, where she was taught to sew by expert seamstresses; she also studied pattern making and design and worked as a fashion designer in the late 80s and early 90s. Monica started her own business as a sewing tutor and began publishing her own patterns in 2002. (Prior to that, she was quiltmaking and teaching at a local creative sewing store when her 2 children were young). She has also been featured in and has designed many projects for several Australian magazines. Monica has taught thousands of face-to-face sewing classes over the last 30 years and now has a very popular YouTube channel where she can teach anyone, anywhere in the world, to sew from the comfort of their own home. Monica has made so many quilt-as-you-go quilts that she has lost count; her experience means that she has a host of tips and tricks to share with you. The YouTube channel Pattern Poole TV is all made possible by her daughter and business partner Alaura, who is the creative director and videographer. Alaura is also a talented artist that designs fun applique patterns; she also designed the applique blocks in the Island Home quilt. Alaura is a beginner quilter, and during the videos, she asks those all-important questions that beginners want to know. The tutorials are detailed and informative whilst being fun and lighthearted, with some laughs along the way. They don't focus on perfectionism but rather on the fun of learning and surprising yourself with what you can do and achieve. WHAT CAN I EXPECT TO LEARN? Click here to be taken to the Island Home ABOUT page to find out more. So, we hope that answers some of your main questions about Island Home. If you have more, please comment below, and we will answer them. Head to our next post, download your requirements list and get your supplies together! We are aiming to start in mid-October and can't wait to have you along with us! We can't wait to get started again; stay tuned for more details to follow!
- THE JOINING STRIP METHOD: Island Home Part 10.
Our quilt as you go quilt is growing! Watch the video here: Interested in the Island Home course notes? This is how you get them: Pay as you go The course notes are available to purchase on our website here. Become an Island Home Facebook Member More info here Already an Island Home Facebook Member: Head to the private Facebook group, click on GUIDES to download the course notes. Please note: Facebook members do not have access to the Island Home members section on our website because we are phasing it out). Early Bird Members: Click here. (You must be logged in to our website to access the course notes) If you are in the Island Home Facebook group, you can also download the course notes there. We hope that you enjoy part 10 of the Island Home quilt. Happy sewing! Monica and Alaura
- EASY COVER STRIP BLOCKS: Island Home Part 9
In part 9 of our Island Home Mystery quilt, we make 3 easy blocks and join them with the Easy Cover Strip QAYG method on the back. This method is perfect for stitch n flip blocks, applique blocks and patchwork blocks that don’t have points that finish a ¼” away from the edge as you’d lose the points due to the 3/8” seam allowance. (It was not designed with traditional patchwork blocks in mind, it is best suited to modern style quilts). We hope that you enjoy our latest video! Click on the link below to watch. This is how the mystery quilt is looking so far......... Interested in the Island Home course notes? This is how you get them: Pay as you go The course notes are available to purchase on our website here. Become an Island Home Facebook Member More info here Already an Island Home Facebook Member: Head to the private Facebook group, click on GUIDES to download the course notes. Please note: Facebook members do not have access to the Island Home members section on our website because we are phasing it out). Early Bird Members: Click here. (You must be logged in to our website to access the course notes) If you are in the Island Home Facebook group, you can also download the course notes there. We hope that you enjoy episode 9 of the Island Home series. Have a creative week! Monica and Alaura xo
- BIRDS AND BANKSIA BLOCK: Island Home Part 8
Part 8 is a pretty applique block but there's more to this tutorial than meets the eye! The videos are free for everyone to learn and enjoy on YouTube, click on the video at the bottom of this post to watch. In the part 8 tutorial we show how to square an applique block with a regular patchwork ruler. It’s a quick 10-minute tutorial and it’s a handy skill to add to your patchwork and quilting repertoire. You'll also see a quick recap of the 1 to 3 quilt as you go method, as we join the applique block to the Diamond Star Block. This is an easy, fully machine sewn, no sashing method. If you're interested in easy applique, then don't miss our applique video, it's moving, inspiring and educational. You'll realise that there is a deeper meaning to pretty pictures that are made with fabric! One comment we received was that it was better than a TV show! We also think that our Birds and Banksia applique would make a beautiful cushion. (The course notes are available separately and contain full size pattern sheets) This video shows how to make an easy cushion with no piping or zipper. We are very excited with how the Island Home mystery quilt is coming together! The Birds and Banksia block takes pride of place at the top of the quilt. Interested in the Island Home course notes? This is how you get them: Pay as you go The course notes are available to purchase on our website here. Become an Island Home Facebook Member More info here Already an Island Home Facebook Member: Head to the private Facebook group, click on GUIDES to download the course notes. Please note: Facebook members do not have access to the Island Home members section on our website because we are phasing it out). Early Bird Members: Click here. (You must be logged in to our website to access the course notes) If you are in the Island Home Facebook group, you can also download the course notes there. We hope that you enjoy episode 8 of the Island Home series. Have a creative week! Monica and Alaura xo
- 2 PRETTY APPLIQUE BLOCKS. Island Home Part 6.
Unfortunately, due to covid, this week’s YouTube tutorial will be postponed until next week, all being well. Not to worry though, for those that are joining in with the course, the part 6 course notes have the step-by-step instructions and pattern sheets so you can still get started with making these 2 pretty blocks. These applique blocks are made in the same way as part 4, so if you need a refresher, you can always watch the part 4 video again, it’s full of our tips and ticks for raw edge fusible applique, you’ll find the link for the video at the bottom of this page. How to get the course notes if you would like to make the quilt: Pay as you go The course notes are available to purchase on our website here. Become an Island Home Facebook Member More info here Already an Island Home Facebook Member: Head to the private Facebook group, click on GUIDES to download the course notes. Please note: Facebook members do not have access to the Island Home members section on our website because we are phasing it out). Early Bird Members: Click here. (You must be logged in to our website to access the course notes) If you are in the Island Home Facebook group, you can also download the course notes there. We are thrilled with how our mystery quilt is coming together! Here is the part 4 How to applique video if you missed it: Love applique? We have a huge range of PDF applique patterns on our website. Our PDF patterns are instant so you can start stitching today! Check them out here. I'll finish of this blog post with some of our favourite applique designs for a bit of inspiration. Enjoy the rest of your week! Monica and Alaura xo
- THE 1 TO 3 QUILT AS YOU GO METHOD. Island Home Part 5
In episode 5 we make 2 simple 9 patch blocks, set them on point, quilt them and join them to the waratah block with the 1 to 3 quilt as you go method. We also show 3 ways to square a block, this is a handy tutorial with lots of great tips to help you along the way with your own quilting journey. The tutorials are FREE for everyone to enjoy on YouTube. Alaura is a beginner quilter so she asks all the newbie questions, while we sew and have fun and a few laughs along the way. How to get the course notes if you would like to make the quilt: Pay as you go The course notes are available to purchase on our website here Become an Island Home Facebook Member More info here Already an Island Home Facebook Member: Head to the private Facebook group, click on GUIDES to download the course notes. Please note: Facebook members do not have access to the Island Home members section on our website because we are phasing it out). Early Bird Members: Click here. (You must be logged in to our website to access the course notes) If you are in the Island Home Facebook group, you can also download the course notes there. We are thrilled with how our mystery quilt is coming together! Hope you enjoy episode 5 of Island Home, just click on the link below to watch the video. (If you happen to catch the premiere , you can chat to us live on YouTube, click on the link to see what time it drops in your time zone). Monica and Alaura xo
- Our top tips for raw edge, fusible machine applique.
In part 4 ouf our Island Home Mystery sewalong we focus on fusible machine applique. The tutorials are FREE for everyone to enjoy on YouTube, click on the link at the bottom of the page to watch. The 14 page course notes have all the detailed instructions with step by step photos and full size applique shapes. How to get the course notes if you would like to make the quilt: Pay as you go The course notes are available to purchase on our website here Island Home Facebook Members: Head to the private Facebook group, click on GUIDES to download the course notes. Please note: Facebook members do not have access to the Island Home members section on our website because we are phasing it out). Early Bird Members: Click here. (You must be logged in to our website to access the course notes) If you are in the Island Home Facebook group, you can also download the course notes there. Appliqué has a rich history; it dates back as far as the early Egyptians. To put it simply, appliqué is the process of making patterns or pictures with fabric. Fabric is layered on top of a base fabric to create a design. The layered fabric is held in place with hand or machine stitching. There are many ways to appliqué, ranging from the more traditional to modern methods. Fusible applique is made possible with a clever product called fusible web. Fusible web is used to bond 2 fabrics together. Fusible web has paper on 1 side with the web of glue on the other side. Some people have expressed concern with fusible web applique shapes fraying after they have been washed, so this week we put 5 of the top brands to the test. We made a sample block of 5 heart shapes, each heart was fused onto the background fabric with a different brand, the brands that we used are: Vliesofix, HeatnBond Lite, HeatnBond Featherlite, Lite Steam-A-Seam 2 and Tildafix. 2 hearts were blanket stitched, 2 were zig zagged and 1 was stitched with a triple straight stitch close to the edge. We layered the heart block together with batting and backing and stitched around the edge to make a mini quilt. The mini quilt was washed in cold water on a regular cycle in the washing machine. Living in Australia, I would not normally put a quilt in a tumble dryer, I would hang it on the line on a sunny and windy day but as this is not always possible for everyone, we tumble dried our sample on low heat for 25 minutes. And this is the result. The applique pieces remained a tiny bit stiffer than the background fabric which is to be expected because the glue is permanent and does not wash out. There was no fraying on the zig zagged and blanket-stitched hearts because the permanent glue bonds with the outside edge fibres which prevents them from separating. There was a tiny amount of fraying around the edge of the triple straight stitched heart. In conclusion, we were happy with the end result and will definitely continue our love of fusible applique! In the Island Home part 4 video tutorial, we focus on fusible raw edge, machine appliqué whilst giving lots of hints and tips! For easy reference, here are our top tips: 1. Make sure that the fusible web that you purchase is for sewing. Never use heavy or ultra-hold fusible web, as they are not designed to be sewn through and could leave glue all through your machine. 2. Read the instructions for the brand of fusible web that you are using. Different brands have different heat setting for the iron. 3. Use appliqué fabrics that have a high thread count such as quilting cotton or batik as there will be less chance of fraying. 4. When ironing fusible web, protect your iron from stray glue with an appliqué mat or parchment paper. 5. An open toe foot makes it easy to see the edge of the appliqué shape when sewing, it also has a groove on the underneath so that it can easy glide over the raised appliqué stitches to prevent bunching up. If you don’t have one with your machine, it’s worth the investment. 6. Use the correct needle. A size 75 machine embroidery needle is a fine needle with a sharp point, so it won’t leave large holes, especially with the dense stitching around the appliqué shapes. It also has a larger eye to enable the embroidery thread to glide through and prevent breakages. 7. Use good quality machine embroidery threads. For blanket stitch, use a darker colour to stand out. For zig zag, use threads that blend with your appliqué fabric because it will look neater. 8. Is your embroidery thread polyester? If so, don’t iron your completed appliqué as the stitches may melt. Test with a sample first. 9. I like to use bobbinfil in my bobbin, it’s a fine thread and it saves your embroidery thread for the front of your work, however, if you are having persistent tension problems, try using the embroidery thread in the bobbin too. If your bobbin thread is coming to the top, reduce the top tension to a lower number. 10. Stiffen your background fabric with spray starch before applying the appliqué shapes. (Test first to make sure that the spray starch and fusible web that you are using will work together) 11. I prefer not to use tear away stabiliser under my background fabric because removing it when your stitching is complete is time consuming but if your appliqué is puckering as you sew and you have tried reducing your top tension then you may need to use a tearaway stabiliser. 12. Don’t push or pull on your work while you are sewing as this may distort the stitching. Let the machine feed your work through at its own pace and enjoy the process. 13. Having difficulty removing the paper backing from your applique shape? Carefully score the backing paper with a pin and peel away from where the paper has been cut. Click on the link below to watch the video tutorial. Shop our applique patterns here. Comment below if you have any applique tips that you would like to share. Happy sewing! Monica and Alaura
- QUILT AS YOU GO WITH NO SASHING. Island Home Part 2/2.
In this tutorial : The Churn Dash and Ohio Star blocks are joined together using a QAYG technique that does not require sashing. This method is ideal for patchwork quilts where the blocks sit edge to edge, without the interruption of a sashing. We also take the quilting up a notch with some simple continuous straight-line quilting that anyone can achieve with their walking foot attached. The quilting is easy and manageable because with quilt as you go, you are working in small sections! The tutorials are FREE for everyone to enjoy, click on the link at the bottom of the page to watch. How to get the course notes if you are making the quilt: Pay as you go The course notes are available on our website here If you purchased part 1 / 2 you’ll find a CODE on the cover. Use the code at checkout to get the part 2 / 2 course notes for FREE Island Home Facebook Members: Head to the private Facebook group, click on GUIDES to download the course notes. Early Bird Members: Click here . (You must be logged in to our website to access the course notes) If you are in the Island Home Facebook group, you can also download the course notes there. We hope that you enjoy our latest episode! Monica and Alaura xo PS. If you catch the video premiere at 12 pm AEST, April 6, you can chat to us live. Or you can watch the tutorial in your own time.
- ACCURATE PIECING FOR QUILTING!
Part 2 of our Island Home quilt as you go master class has 2 parts! Why? The end goal for part 2 is showing how to quilt as you go with pointy blocks and no sashing, this is for blocks that sit edge to edge in a quilt design, it’s especially useful for quilt blocks that have a secondary pattern when joined together. How to do this, is a question that comes up a lot. A pointy block is any block that has points that finish a ¼” away from the outer edge. Accurate piecing is the starting point for this method, as obviously all blocks need to be the same size and the points really do need to be a ¼” away from the edge, otherwise they are at risk of being lost in the seam. Accurate piecing comes natural to some and not to others. So, in episode 2 part 1 we take a deep dive into accurate piecing whilst making 2 traditional blocks, Churn Dash and Ohio Star. No matter your skill level, it’s always fun and satisfying to make these traditional patchwork blocks that have been around for centuries and stitched by many quilters before us. Episode 2 part 1 is a 45-minute tutorial where we discuss the scant ¼” seam allowance, the “pin trick” for accurate seams, pressing techniques, the grain line plus lots more. We don’t want to take short cuts and we don’t want you to miss a thing, so that’s why, part 2 has 2 parts! In episode 2 part 2, we will quilt and join those pointy blocks together with a quilt as you go joining technique that has no sashing. Episode 2 part 2 will premiere on YouTube next week, 12 pm, April 6 2022 Sydney Australia time. If you are making the quilt: Pay as you go The course notes are available to purchase here You'll find a code on the cover to get part 2/2 for free when they are available next week. Island Home Facebook Members: Head to the private Facebook group, click on GUIDES to download the course notes. Early Bird Members: Click here . (You must be logged in to our website to access the course notes) We hope that you enjoy our Accurate Piecing tutorial! Monica and Alaura xo
- QUILT AS YOU GO BORDER AND BINDING: Island Home Part 13.
Rewind back to January 2022, and the Island Home Quilt was still in the planning stages. The idea was to design and teach a quilt-as-you-go masterclass with one quilt that is made with six different joining methods. So, drawing on our Mother and Daughter combined skill set, we brought the Island Home quilt to life! From printing our own original fabric that was designed by Alaura’s partner Alex Birdfox to the technical side of designing a quilt that could actually fit together with so many QAYG methods, with videos and course notes, what a journey! It was a mammoth task, and there were only supposed to be 12 parts, and here we are at part 13. Oh, and that’s not all; we’ve decided on one more bonus video; read on to see why…… Click on the link below to watch the quilt as you go border and binding video. Purchase the course notes here: https://www.patternpoole.com/purchase-course-notes Some fun facts about the quilt: It was a toss-up between a black or cream background, we decided on cream at the last minute because our last quilt, Twilight Dreaming, was on a black background, so we wanted to do something different. I wanted the quilt to be made up of squares that were all the same size, but Alaura insisted on an offset design “That’s too hard” I said, and Alaura said, “No it’s not; you can do it Mum!”. Originally the quilt was going to be all applique, but Alaura liked the idea of a patchwork and applique combination. “That’s going to be too difficult because patchwork blocks can vary in size from person to person,” I said. “It’s going to look great, Mum; you can make it work!”. So, Alaura pushed me out of my comfort zone, and together we created the Island Home Quilt. We did it, yay! I suppose that sometimes we all need a little push out of our comfort zone to surprise ourselves with what we are capable of! I still have to pinch myself sometimes to think that with modern technology, we can come together from all over the world and quilt together. It is such a thrill for us to see all the beautiful Island Home quilts that have been made by the course participants; for some, it is their first quilt! If you have made the quilt, please email a photo to studio@patternpoole.com . In the coming weeks, we want to share your beautiful work in a special blog post. We are so proud of you all! So, here’s the story behind the 7th quilt-as-you-go technique. Some people mentioned that they would like to make their quilt bigger, and with this on my mind, I had a light bulb moment about a 7th technique, a FAUX QAYG mitred border. During the videos, we started saying that the course had 7 techniques; now, we couldn’t actually fit the 7th technique on the quilt, so the idea was to show a sample of the technique while adding a border to our Tabitha the Tiger applique. This week was to be the final video for the course, where I add a thin border around the Island Home quilt using the Easy QAYG border technique. (The 6th technique) This is a relatively easy technique; you can see how I used it to add multiple borders to our Fi Fi Flamingo applique pattern, it looks great, but the downside is that the top and bottom borders sew across the side borders and sometimes you may prefer the look of a mitred corner. Watch the video here. I was all prepared, the border strips were cut for the FAUX mitred corner, with a step-by-step script; here’s a sneak peek of what we were working on. I’d shown how to make your own template, and I began cutting the corner triangles; I’d cut a total of 8 triangles and feeling quite clever with myself, I began to arrange them to form the mitred corner blocks, just like the sample above. Oh no! I forgot to make them pairs, eight triangles all facing the same way! What? Why? It worked with my sample pieces. You know that feeling when your mind just goes blank? Well, that was me. Feeling defeated as I'd used up all my fabric, we took a lunch break to regroup. We’re on a tight schedule to film the videos because Alaura needs 2 to 3 days for the editing; otherwise, she’ll work through the night, and we don’t want that! So the decision was made to finish the quilt and wrap up the video and for me to re-do the borders, and show how to do it in a blog post. After sleeping on it, I decided that it won’t beat me! There will be one more video in the coming weeks to show the 7th technique! We’re not sure of the date yet, but we’ll let you know. While we’re on the subject of borders, lets’ look at some quilt-as-you-go borders that I have done in the past. Café et lait Quilt (PDF pattern available here) Applique borders and corner blocks joined with the Cover Strip method on the top of the quilt. Twilight Dreaming. (PDF pattern available here) Applique borders and foundation pieced corner star blocks joined with the Easy Cover Strip method on the top of the quilt. Watch the video series here. Happiness Quilt (PDF pattern available soon) Floral borders attached to the quilt with the Easy QAYG Border technique. Gidget (PDF pattern available soon) Stitch and flip crazy patchwork borders and corner blocks joined with the Cover Strip method on the top of the quilt. Peacock’s Garden (PDF pattern available soon) Applique borders joined onto the quilt with the Easy QAYG Border technique. Blossom (PDF pattern available soon) Side borders are bias applique joined onto the quilt with the no sashing method. Hand sewn on the back. Star Struck (PDF pattern available here) Wonky star block borders attached to the centre rectangle with the 1 to 3 method. Shades of Indigo. As I add this photo, I just realised that this quilt was made 21 years ago! Probably why the picture is not clear; I've updated my camera quite a few times since then! I’ve never had the time to go back and put this quilt into a pattern. The borders for this quilt were quilted first, the crisscrossing is ¼” bias. The side borders were joined to the quilt with the 1 to 3 method. The corner fan blocks were made separately and added to the opposite ends of the top and bottom borders with the no sashing, hand-sewn backing method before being joined to the quilt with the 1 to 3 method. To finish this blog post I would just like to say from Alaura and I, THANK YOU from the bottom of our hearts to all those that join in with our courses, purchase our PDF patterns, watch and subscribe to our YouTube channel, Pattern Poole TV or just simply like and share our Facebook posts to help our business grow. Your support means that we can continue running our mother and daughter digital business. Love and hugs, Monica and Alaura
- Island Home - Requirements List Run Through
Welcome to the Island Home Requirements list Run Through. In this section, you will find a video explaining the requirements list and a PDF document for you to download. We have also included some additional learning content for anyone wanting to get a head start. Please download the Island Home Requirements Checklist below and follow along with the video if you need it. Additional Videos: Here are some helpful videos from our YouTube channel for anyone looking to get a head start. If you have any questions please leave them in the comments below. Don't forget to comment below with your favourite brands and places to get supplies. xoxo Monica and Alaura
- The Quilt As You Go Planner
The Quilt As You Go Planner is now only available as a PDF Book. There is inspiration for quilting everywhere! More and more I'm finding that people want to design their own quilts with their own personal style and creativity. When it comes to quilt as you go, my best advice is to plan! What is quilt as you go? Quilt as you go is the process of dividing a quilt design into sections, quilting each section separately then joining the sections together to make the complete quilt. It's great because it's much easier to quilt smaller pieces as you go rather than a large quilt top. There are various ways to join quilted pieces together but the Planner focuses on my favourite technique that I refer to as the Modern Method. I call it the Modern Method because it's fully machine sewn and it makes great modern style quilts. (I now refer to this method as the Easy Cover Strip Method, here is a video showing how to do it). In my opinion, it's the easiest quilt as you go technique there is! I'm proud to say that I was the first designer in Australia to develop this technique and I've been publishing this technique in quilting patterns since 2005. The Modern method uses the tram (cover strip) to cover the join as shown in the quilt picture below. This is the Penguin Party quilt, the aqua strips are the trams (cover strips), you'll also notice that the binding is the same with as the trams, this is my 1" wide machine sewn binding, I also show how to do this in the planner. This is how the planner works......... There's an inspiration gallery showing over 15 quilts that have been made with the Modern Method (Cover Strip Mehtod). The possibilities are endless! These patterns aren't in the planner, they're just there for you to get inspiration for your own designs. The Planner shows you how to quilt as you go with the modern (cover strip) method along with my top tips and advice for quilt as you go, stitch and flip piecing, fusible machine applique and how to do my modern machine sewn binding. Next, choose a plan and start designing your own quilt as you go quilt. The plans range in size from cot, lap, single bed, king single, double bed, queen and king size. There are plans for 9” squares, 12” squares, 12” x 16” rectangles (perfect for those wanting to make the Windows into Africa applique patterns into a quilt), framed 12” squares, horizontal panels, vertical panels and even 2 medallion plans. All plans include cutting instructions and a requirements list (in metric) to make it easy for you to fill in with your own creativity! There are 72 pages in total and on the last pages there are some cute applique designs that you can use in your quilt. You can purchase the PDF book from our website. Happy quilting! Monica xo
- The Pattern Poole Scrap Book Entry 1
See what other's have made from our Pattern Poole Sewing Group Last week we added a post to our private Facebook group, asking members to submit their work and this is the result. We love seeing our members' photos and hope you enjoy seeing all their creative talents! Julie has made the Miss Daisy pattern and used black for the background and for the QAYG cover strips giving the quilt a cool floating look! - Well done Julie! Lorraine has made the Cherry Cheer pattern but instead of using red like we did she added some beautiful autumn colours and we are in love! A beautiful, fun, and floral Miss Daisy made by Jodi. The lovely placement of colour with the yellow pinwheels and diverse background fabrics ties it all together. Great work! Janet Diaz has been on fire making plenty of Pattern Poole applique designs. Janet has created her own take on the Ocean Blue applique set with her whale quilt and sea creature quilt which were planned out by Janet herself. The dreamy blue colours tie all these appliques together! We love it! A pink Giraffe and Blue owl - we are sold. The colour palette in both of Christine's designs is extremely effective! The pinks in the giraffe and blues in the owl are broken up with bright contrasting colors adding depth to her work. Diana has created a beautiful quilt using her favourite Pattern Poole applique patterns. The additional text adds a lovely point of view to the quilt that draws your eyes all over the design. We love the layout and colours - how lucky is Maddison! Candance's blocks from our free QAYG along on YouTube look so cute and dreamy, the pops of purple and bright turquoise go great with the pastel green and the neutral tones. We can't wait to see this joined together! When we saw this we were instantly obsessed! Vanessa has created her own QAYG quilt using the French Braid block from our free QAYG along. We love the arrangement of the blocks and the contrast of the patterned background offering depth. This is very modern and chic! Stacey has made a gorgeous sampler quilt and the mix of colours and pop of green is really effective! It draws our eyes all over the image showcasing all her work. Well done Stacey! Shirley has made the cutest rabbit quilt using our Ruby Rabbit applique pattern. We love the giant rabbit in the centre and the great use of fabric panels in between featuring rabbit fabric. Well done! Margie has made a stunning Miss Daisy quilt and has positioned the blocks in such a perfect way creating another design within the design! This is so creative and clever! We love it! Shanarz's cute blocks from our free QAYG along are divine! The pop of lime green is so stunning in contrast to the blues and purples. We are very excited to see these joined together! Another gorgeous Miss Daisy by Angela using white colour strips and background. This colour palette is so fresh and timeless! Well done! Nita has made a cute pinwheel-style quilt using the easy cover strip method. The placement of the colours really enhances the pinwheel design and we love it! If you would like to enter your photo for the next scrapbook entry please email studio@patternpoole with a clear front-on photo of your work. Thanks for reading, Lots of love, Monica & Alaura
- Easy Quilt As You Go Border Video
In this video, I show a really easy way to add a quilt as you go border, it's also a great way to increase the size of any quilt that hasn't already been finished with a binding. For the example, I use our Fi Fi Flamingo applique pattern that I used as the demonstration for the previous video, Basic Machine Quilting with a Walking Foot. I decided to make a small quilt with 3 scrappy quilt as you go borders so I searched through my stash and selected some light and dark pink fabrics. (I had some left over fabrics so expect a scrap quilt video tutorial in the future) This is how it turned out...........(I'm in love!) I hope that you enjoy the video, Happy quilting! Monica xo
- Working with Cork Fabric
Cork fabric is on trend right now. I was intrigued with this product and wanted to find out more so after some quick research on the internet I found out that Cork is a natural, environmentally friendly resource. Cork comes from the Cork Oak Tree that is native to Portugal. The bark is stripped from the cork tree and shaved into thin sheets, this does not harm the tree and it lives on to harvest cork around every nine years, cork trees can live for hundreds of years! The thin shavings of cork are adhered to a backing fabric that is made up of polyester, cotton and polyurethane. My next step was to put it to the test and to start experimenting, I wanted to see how it worked with some of my existing bag patterns and I must say that I was pleasantly surprised, so much so that it inspired me to design a new pattern especially for cork fabric called the Trio Pocket Purse. Cork fabric has some great properties that make it easy to sew. It’s light weight, smooth, easy to manoeuvre and it doesn’t stretch or fray. So here are my top tips for working with cork fabric on a domestic sewing machine: Use a size 80 needle, a Jeans, Microtex or even a Universal needle will do the job. Also, increase your stitch length to 3. Sew cork with an all purpose 50 weight thread, I used Guitermann polyester. Don’t use pins on cork fabric as the pin holes will be permanent. When sewing, pin in the seam allowance or hold layers together with Wonder Clips. Overlay pieces can be held in place with sticky tape before sewing. When cutting out the cork fabric, use sticky tape to hold the pattern pieces in place and cut all straight edge pieces with a rotary cutter, ruler and cutting mat to give nice clean straight edges, this is especially important for pieces that are going to have raw edges. (More on raw edges below) Use a 4B lead pencil to mark position points onto the cork fabric. Think ahead to reduce bulk in the seams. I would say that 4 layers of cork fabric would be the maximum to sew through on a domestic sewing machine. Sew straps, tabs and trims with raw edges. (This will also help to reduce the bulk in the seams) Cork fabric is very stable, it doesn’t stretch or fray, this means that there is no need to have the seams turned under on straps, tabs and trims. Cut pieces like this less the seam allowance and position back to back, holding together with liquid pins or wash away double-sided tape before top stitching close to the edge. Cork also makes great zipper pocket overlays and is very easy to do with the raw edge! Use a matching coloured thread for top stitching the cork fabric. If you need to unpick stitching from cork fabric the needle holes will be permanent so if you’re not feeling confident, use a matching coloured thread so that any little wobbles won’t stand out. Cork is a beautiful feature and looks great with matching coloured top stitching anyway. There is no need to use a special Teflon foot, cork will sew easily with your standard machine feet. Keep reading to see how I adapted the Mirabella Bag pattern to include cork trim, next week I'll show how I made the Adventurer Bag with cork. Mirabella Bag with Cork Trim. Kits for this bag are available here while stocks last. (This is just a brief tutorial showing how to use cork, the pattern pieces and instructions on how to make the bag are in the pattern that can be purchased here ) Prepare the pattern pieces by halving the strap casing piece as we only need it to be a single layer and remove the 6 mm (1/4”) seam allowance on the flap as shown in the picture above. Cut out the bag front and the cover strap from the exterior fabric. Open out the front bag piece and lay it onto the cork fabric to use it as a pattern for the back of the bag. Position the bag base, the strap casing 2 x tab pieces and the zipper pocket overlay that you can down load here . Tape the pieces in place then cut out all straight edges with a rotary cutter, ruler and cutting mat, cut curved edges with your scissors. Cut the long straight edges of the zipper pocket overlay with a rotary cutter and the short ends with scissors as shown in the pictures below. Cut out the lining pieces. Cut out a piece of foam interfacing for the front of the bag. As the cork fabric is already quite stiff I interfaced it with Shapewell which is a white woven non fusible interfacing to add some extra body without the bulk of a foam interfacing. Cut the straps, tabs and handle from the same fabric as the front of the bag. Cut light weight iron on pellon for the straps. Mark the zipper pocket opening onto the wrong side of the lining pocket piece. Place the pocket piece right sides together with the main bag piece. Stitch the pocket rectangle then cut in the middle of the rectangle and out to the corners, cutting through all layers. Working from the wrong side, to reduce the bulk, trim away the foam interfacing from the rectangle. Turn the pocket through the opening to the wrong side and pin to hold in place. Using a large stitch length, tack around the outer edge of the rectangle opening to hold in place before sewing in the zipper. Use double sided wash away tape to hold the zipper in place . Peel away the paper backing. Position the zipper and stitch close to the edge of the rectangle opening to hold in place. Next, unpick the tacking stitches. Position the cork zipper pocket overlay, hold in place with sticky tape and stitch close to the edge of the cork on the inside and on the outside edge. Attach the magnetic clip to one of the flap pieces and the bag front. Sew the 2 flap pieces with the backs facing sewing close to the edge. Sew the ring tabs, handle, cover strip and strap casing onto the back of the bag. Attach the zipper to the top edge of the bag front. Attach the zipper to the top edge of the bag back. Attach the bag feet then sew in the exterior base. Make up the lining and attach to the top edges of the bag, sandwiching the zipper between the lining and the exterior fabric. Position the bag so that the front and back lining is right sides together and the exterior bag is right sides together. Sew the side seams leaving an opening in the lining on one side. Turn the bag through to the right side and hand stitch the opening closed. Attach the straps. The bag can be used as a backpack. Or a shoulder bag.